 |
|||
|
Page Title:
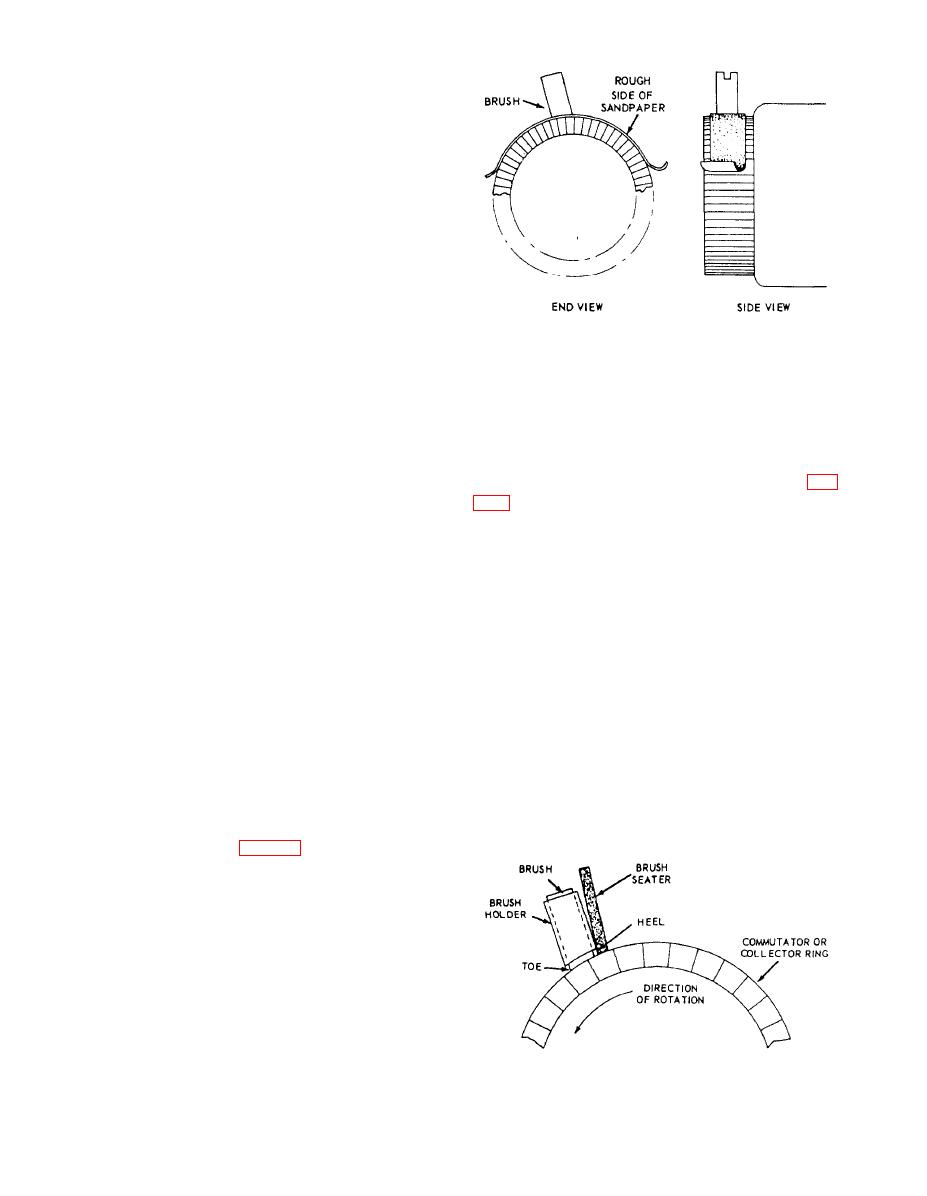
Figure 3-11.--Method of sanding brushes. |
|
||
| ||||||||||
|
|
 from between the brush and commutator without
offering resistance. This reading divided by the
contact area may be considered to be the spring
operating pressure.
The toes of all brushes of each brush stud should
line up with each other and with the edge of one
commutator segment.
The brushes should be evenly spaced around the
commutator. To check brush spacing, wrap a strip of
paper around the commutator and mark the paper
where the paper laps. Remove the paper from the
commutator, cut at the lap, and fold or mark the paper
into as many equal parts as there are brush studs.
Replace the paper on the commutator, and adjust the
brush holders so that the toes of the brushes are at the
creases or marks.
start the machine. Press a brush securely against the
All brush holders should be the same distance
commutator by using a stick of insulating material or
from the commutator, not more than one-eighth inch,
by increasing the brush spring tension to its maximum
nor less than one-sixteenth inch. A brush holder must
value. Touch the brush seater lightly to the
be free of all burrs that might interfere with the free
commutator, exactly at the heel of the brush (fig.
movement of the brush in the holder. Burrs are easily
removed with a fine file.
seater will be carried under the brush. You must hold
SEATING.-- Accurate seating of the brushes
the brush seater behind each brush, applying the seater
must be ensured where their surfaces contact the
for a second or two, depending on brush size. Do not
commutator. Sandpaper and a brush seater are the best
hold the seater steadily against the commutator
tools to accomplish a true seat.
because it will wear away too rapidly and produce too
Disconnect all power from the machine. Before
much dust. After seating one or two brushes, examine
using sandpaper to seat the brushes, you must take
them to see if the seater is being applied long enough
every precaution to ensure that the machine will not
to give a full seat. After seating the brush, if white dust
be inadvertently started.
is plainly visible on the seat, you have applied
Lift the brushes to be fitted, and insert (sand side
insufficient pressure to the brush, or applied the brush
up) a strip of fine sandpaper (No. 1), about the width
seater too heavily or too far from the brush. Be careful
of the commutator, between the brushes and the
not to remove the copper oxide film from the
commutator. With the sandpaper held tightly against
commutator surface. If you remove this film, you must
the commutator surface to conform with the curvature
restore it.
and the brushes held down by normal spring pressure,
pull the sandpaper in the direction of the normal
rotation of the machine (fig. 3-11), When returning the
sandpaper for another pull, lift the brushes. Repeat this
operation until the seat of the brush is accurate.
Always finish with a finer grade of sandpaper (No. 0).
You need a vacuum cleaner for removing dust while
sanding. After sanding, thoroughly clean the
commutator and windings to remove all carbon dust.
The use of a brush seater will further improve the
fit obtained by sanding. A brush seater consists of a
mildly abrasive material loosely bonded into a stick
about 5 inches long. To use a brush seater to seat the
brushes, install the brushes in the brush holders and
3-19
|
|
Privacy Statement - Press Release - Copyright Information. - Contact Us |
